Manual for installation and use of LED lighting
By Teun / Feb. 5, 2024
Upgrading to LED lighting is a great way to save energy and add bright, efficient lighting to your home. In this article, we will explain step by step how to connect LED lights.
Whether you’re working with LED strip lights or LED panel lights for the first time, or replacing an old halogen bulb with an LED bulb, this guide makes it easy for you. You’ll also learn how LED bulbs compare to other types of bulbs, so you can make the best choice. Step by step, we’ll help you make your home more beautiful and energy-efficient.
How should you connect an LED bulb?
When we talk about LEDs, we’re referring to various types of lighting. There are LED light sources that serve as replacements for old-fashioned energy-saving bulbs and incandescent bulbs, and there are integrated LEDs. These are lights that are already built into the fixture (the light fixture itself) and cannot be replaced. Both types of lights require different installation methods. With LED light sources, it’s simply a matter of unscrewing the old bulb and screwing in the new one. Connecting integrated LEDs is essentially the same as connecting a standard ceiling light or wall sconce. Below is a step-by-step guide for connecting these types of lights.
- Step 1: Safety First. Make sure the power is off before you begin. You do this by turning off the appropriate group in your meter box. Always check that the power is really off with a voltage detector. If the light on the voltage detector is not lit, there is no more current on the wires.
- Step 2: Make sure you have all the supplies on hand. For an integrated LED bulb, you don't need individual bulbs, but make sure the fixture is complete and the necessary fasteners are present.
- Step 3: Removing the old bulb: If an old bulb or fixture is present, remove it carefully.
- Step 4: Attach the mounting bracket. Using screw plugs, screw it to the ceiling. Depending on the center boxes in your home, you will need to screw the mounting bracket to the center box or attach the mounting bracket to the ceiling. In older homes, it is often necessary to drill holes in the ceiling to attach the mounting bracket.
- Step 5: Strip about 0.5 cm of the green/yellow, brown and blue electricity wires using a pair of stripping pliers.Remove the mounting bracket from the fixture and Attach the electricity wires to the terminal block. Insert the electricity wires into the openings of the terminal block and screw them firmly with a screwdriver.
- Step 6: Attach the fixture. Attach the ceiling lamp to the mounting bracket. You usually do this by tightening the lamp's terminal cap to the mounting bracket with two screws on the side.
- Step 7: Testing. After the lamp is installed, you can turn the power back on and test if the lamp is working properly.
Remember that it is always important to follow the manufacturer's specific instructions, as connecting an integrated LED bulb can vary from product to product. If in doubt, it is advisable to consult a professional electrician. If you need more questions or explanations we recommend contacting customer service
Watch the video for mounting ceiling lights here:
Changing an LED bulb? How to do it.
Replacing an LED bulb is generally not a complicated task. Unfortunately, it is not possible to replace an integrated LED. Fortunately, this won’t be necessary anytime soon due to the long lifespan of LEDs. Replacing your light sources with LEDs is basically simple: unscrew the old light source from your existing fixture and replace it with the new LED light source.
However, it is important to check carefully in advance that the new light source meets the requirements of your lamp. A few details are important for this. These are always listed on the packaging of your new light source.
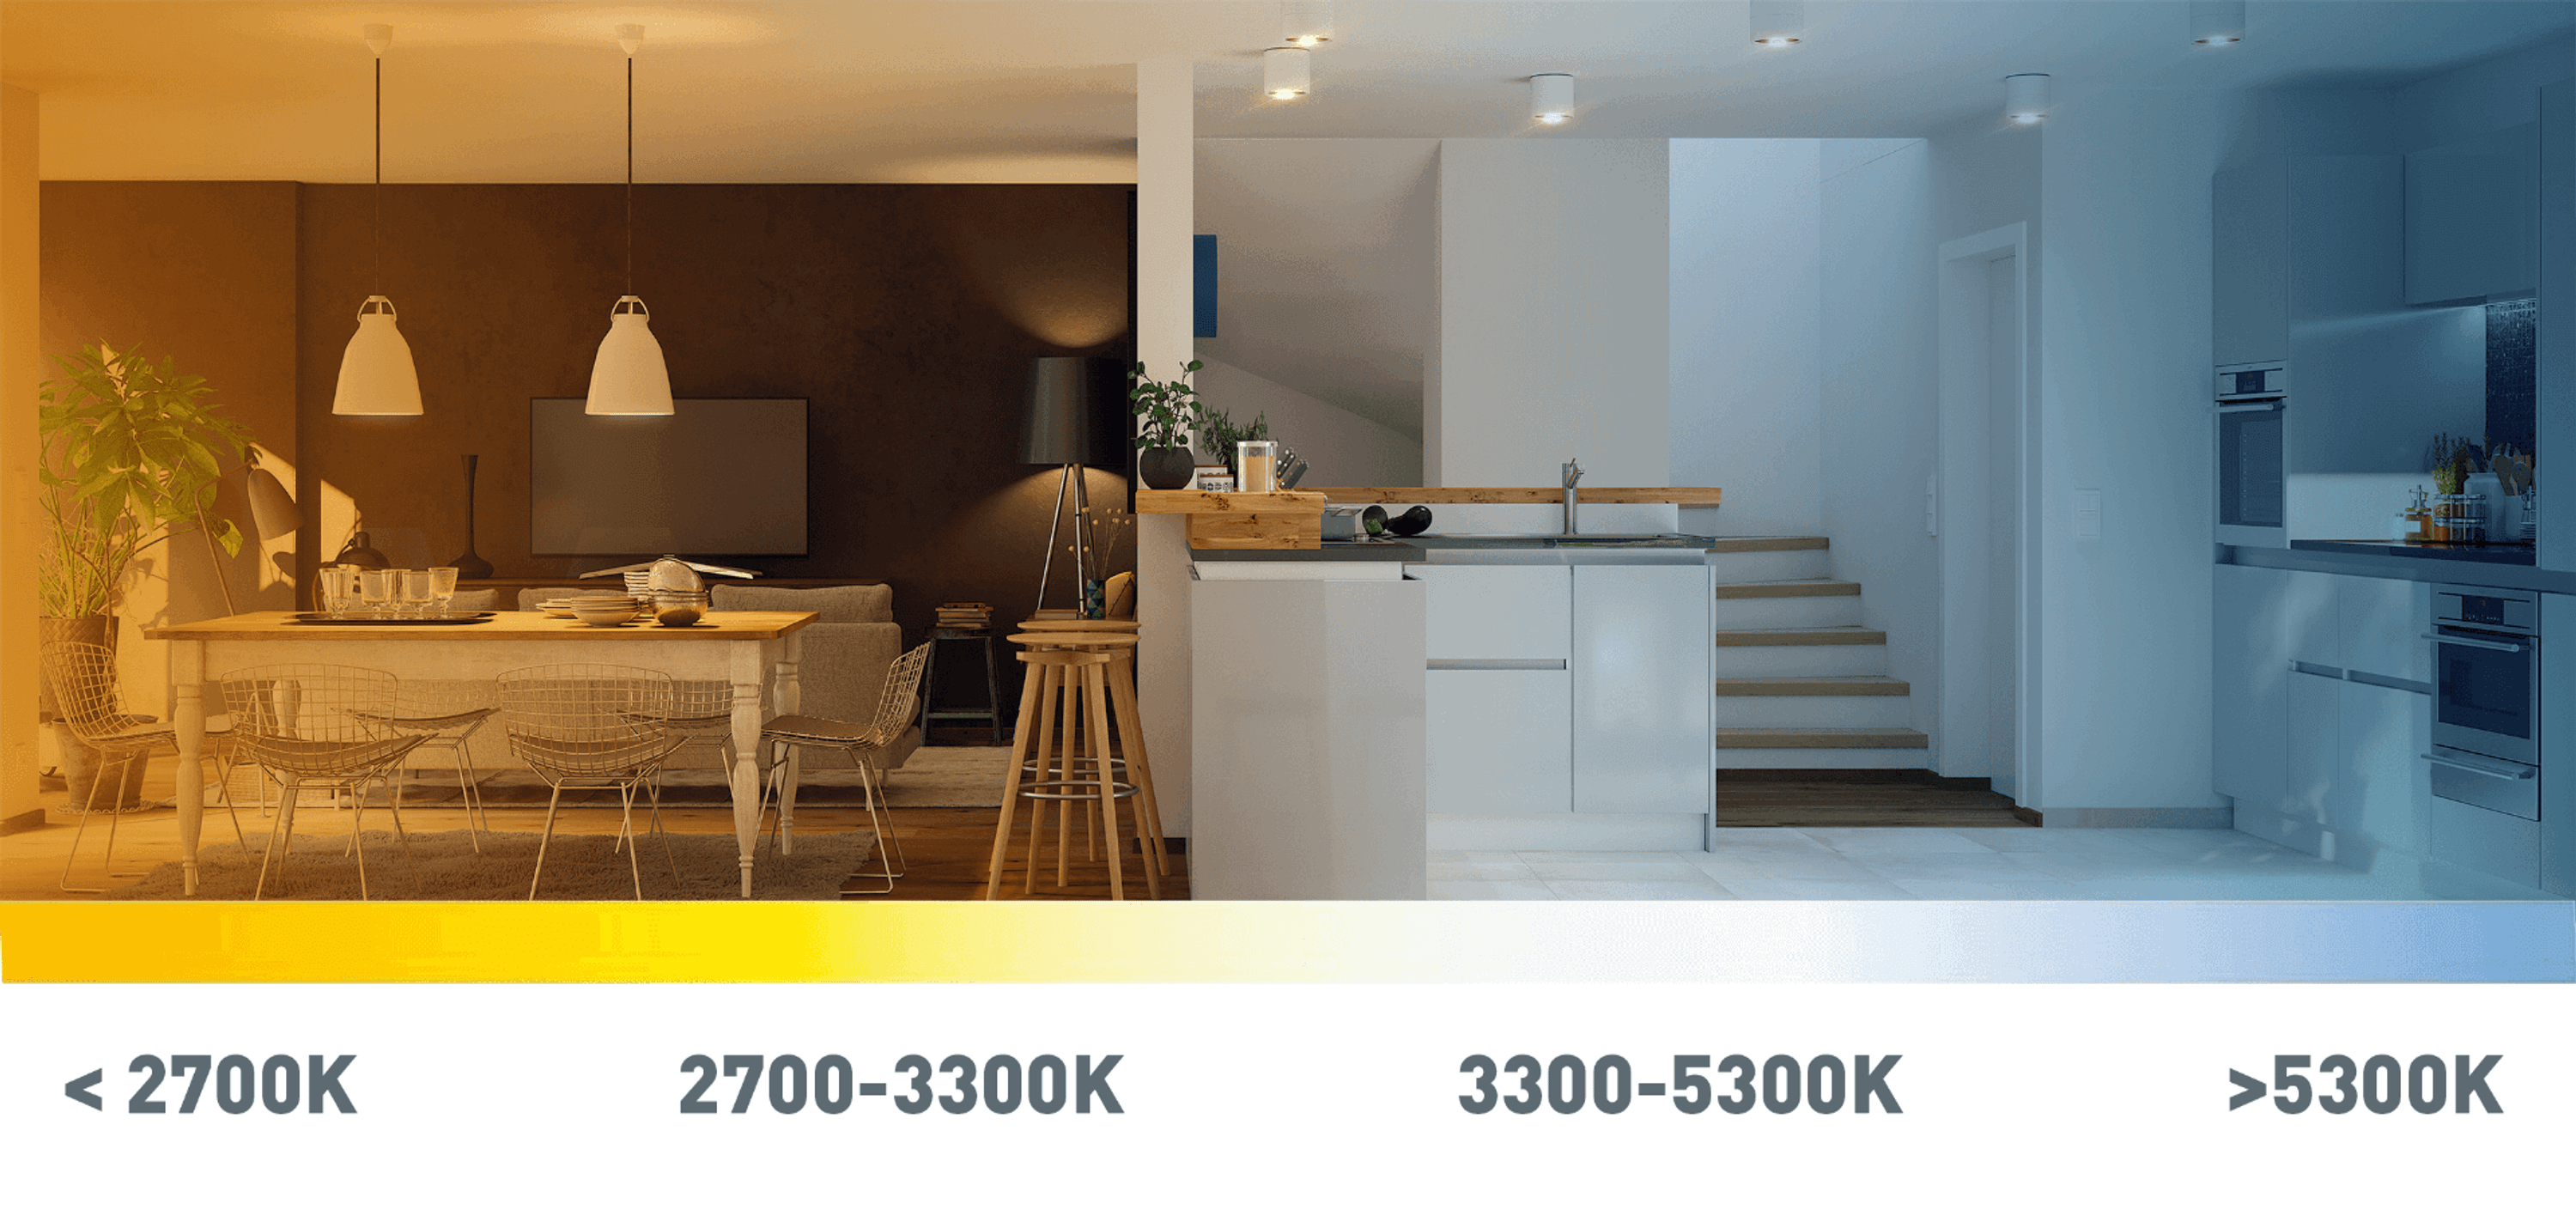
- Kelvin: This indicates the light temperature. The higher the Kelvin value, the whiter the light. This has nothing to do with the brightness of the lamp, but only indicates the color of the light the lamp will emit. In most households, a value of 2700 kelvin is used by default, which provides warm white light suitable for kitchens or bathrooms, for example. If you want more ambience, you can choose 2200k or even 1800k, resulting in warmer, more atmospheric light. For whiter, functional light, consider 3000k or higher.
- Lumen: This indicates how bright the light is. The higher the lumen count, the more light the lamp will produce. The lumen rating is similar to the old wattage, but multiplied by 10. So if you have an old 25 watt bulb and you want the same amount of light in LED, you should look for a light source with about 250 lumens. The wattage of LED lights no longer indicates the brightness of the bulb.
Read more here about choosing the right LED bulb.
Dimming LED
The dimmability of a lamp is always in the lighting itself. This means that in principle every lamp in which you turn another light source yourself has the possibility of dimming. Always make sure you choose a dimmable light source if you want to dim it. This is always indicated on the packaging. If you connect a non-dimmable lamp to a lamp with a dimmer you run the risk that it will break down.
Although it’s very easy to switch your existing light sources to LED versions, problems can sometimes arise if you’ve connected your lights to an existing dimmer. If you still have an older dimmer designed for halogen, energy-saving, or incandescent bulbs, your new LED lights may flicker, even if they are dimmable. This also significantly shortens the lifespan of the light sources. To prevent this, you’ll need to replace your dimmers with LED dimmers. Read more about dimming LED lighting.